What is a microcapsule? It is just a very small capsule which is so small you need a microscope to see it well. Researchers are trying to use the process of making microcapsules, called microencapsulation, to make our lives better.
Summary
What is a microcapsule? It is just a very small capsule which is so small you need a microscope to see it well. Normally when you think about a capsule, you think of a type
of medicine like liquid gel-cap. An active ingredient (usually a liquid) is trapped inside a solid outer layer. There are many reasons to put something in a capsule. In a gel-cap, you want to keep the active ingredient, the bad tasting medicine, on the inside from reacting with something (like your tongue) before you want it to. However, when it is time for the inner material to be used, you have to get it out of the outer layer. The gelatin layer of a gel-cap dissolves in your stomach, releasing the medicine so that it can be delivered to the part that needs it.
Researchers are trying to use the process of making microcapsules, called microencapsulation, to make our lives better. One way these microcapsules differ is in the way they are opened. Four methods of releasing the inner active ingredient are with examples below.
- physical rupture (outer layer is broken) – examples: scratch-and-sniff stickers, carbonless paper
- dissolve outer layer – example: detergents
- melt outer layer – example: some baking mixes
- diffusion through outer layer (tiny amounts come out through the layer overtime) - example: aspirin
In this activity we will:
- Understand how microcapsules work
- Make a model of microencapsulation
Materials needed
- Balloons – Helium Quality (smaller works better, preferably see-through)
- Cotton Balls
- Flavor Extract (mint or orange)
- Plastic straw
- Push Pins with plastic ends
- 1” Ceramic Magnets – 2 stacked together will work well
Activity
- Stretch the balloon, and blow it up. Do NOT tie it off, instead let the air back out. Thepurpose of this is to stretch out the balloon. The thinner the rubber of the balloon, the easier it will be to pop later!
- Use a straw as a dropper (see the following) to add several drops of flavor extract to acotton ball. Place the bottom tip of the straw so that it is barely under the surface. Place your finger tightly over the top of the straw. Remove from the liquid. When you takeyour finger off the top, the water will drop out. (If you are unsure about this method, practice with a cup of water, and make sure not too get too much liquid.
- Put the cotton ball in the balloon by using your fingers from both hands to stretch itopen and your thumb and forefingers to put the cotton ball inside. Be careful not to get any of the scent on the outside of the balloon.4. Now add 1 or 2 tacks, being careful not to puncture the rubber of the balloon.
- Adding cotton ball Adding the tacks
- With the cotton ball and tack(s) at the bottom of the balloon, gently blow it up until it is 3-4 inches in diameter (for a 7 inch diameter balloon.) Tie off the balloon to seal it.
Safety Warning: Do not blow it up too big or the balloon will pop with too much force, and pins could go flying and hurt someone!!

The Demo
What you have made it called a model. It is a way to show something that you couldn’t normally see. In this case, the NASA microcapsules are too small to see without a microscope, so we have made a larger model of them!
1. Smell the balloon and answer the following questions.
a. What does it smell like?
b. Is the smell very strong?
c. Which part of this set-up is like the outer layer of a microcapsule?
d. Which part of this set-up is like the “active ingredient” in a microcapsule?
Hint: Remember an active ingredient is something that can react with something, like your nose, and is found inside the microcapsule.
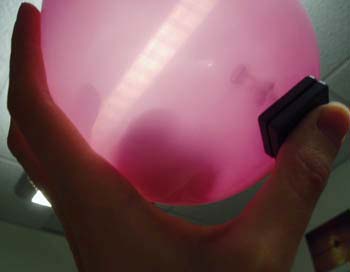
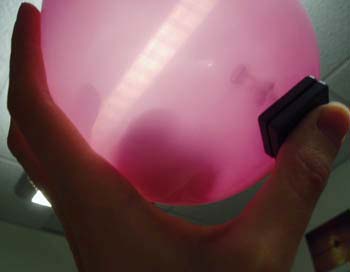
2. Place the magnets on the side of the balloon. Use the magnet to move the pin away from the cotton ball. Rub the magnet back and forth against the side of the balloon until the balloon pops. (Rubbing the balloon on the side, rather than the bottom where the tie is, works better because the rubber of the balloon is thinner there.) Safety: Be careful to pop the balloon AWAY from your face! When you are finished, the tack should stick to the magnets (see picture).
a. What type of method (of the 4 described in the introduction) is being used to open your capsule?
b. The magnets and plastic tacks in this demo are used to release the active ingredient. What are plastic tacks like in the NASA microcapsules?
c. The magnets pull the tacks to break the capsule. What is this similar to in the NASA microcapsules?
d. Name several ways the model capsule you made DIFFERENT from the NASA microcapsules? (e.g. Do you think there is air inside the microcapsules in your body?)
Troubleshooting**
Solving problems is a major part of a scientist’s job. A good scientist is willing to try an experiment many times until it works correctly. Try not to get frustrated if your model does not work the first time (e.g. the balloon doesn’t pop immediately.) Think about things that could be improved, starting with your set-up.
1. How could you solve each of the following problems?
Possible Problems:
a. Where you are rubbing the balloon with the magnet is not the thinnest part
b. The balloon is too thick
c. One tack is not enough
d. The wrong side of the tack is sticking to the magnet
e. The magnet is not strong enough
2. Which problem(s) in question 1 might be the easiest/quickest to solve?
3. Can you think of other possible problems? If so, list them here.
**Try some of your suggested solutions above to see if they improve your demonstration.
Extension (at home): Be a museum demonstrator and amaze your friends and family! (see steps below)
1. Complete all the steps in the Activity section.
2. Get your audience. Explain the NASA microcapsules to them (see Introduction).
3. Show them your model capsule. Explain to them that the cotton ball is your active ingredient, and you have encapsulated it with the balloon! The plastic pin(s) will allow you to open the microcapsule at the proper time.
4. Place the magnets on the side of the balloon. Explain that the magnets make a magnetic field that attracts the metal of the pins. This is like the magnetic field (MRI) used on the NASA microcapsules. The pins are like the tiny pieces of iron found in the NASA microcapsules.
5. Use the magnet to move the pin away from the cotton ball. Rub the magnet back and forth against the bottom of the balloon until the balloon pops! Safety: Be careful to pop the balloon AWAY from the faces of you and your audience! When you are finished, the tack should stick to the magnets (see Demo, step 2). Explain that placing the magnets close to the pins is like using the magnetic field of an MRI. The pins are attracted and break the capsule like the metal pieces in the NASA microcapsule. Now your active ingredient is free to react.
You might want to practice your demonstration several times before you show it to an audience!
References:
1. NASA-Advanced Technology, Microencapsulation: http://slsd.jsc.nasa.gov/bso/advtech/?viewFile=microencapsulation
2. The Art and Science of Encapsulation: http://www.swri.edu/3pubs/ttoday/summer95/microeng.htm
Activity PDF: microencapsulation.pdf

